Make an open pole Empire swag valance today.
This instructional video shows you how to make an open pole empire swag valance. I know this window treatment style looks complicated but if you follow along with me, you can do it too! This swag valance style is the one that I always get compliments on as I take guests on a tour of my home. Gone are the days of learning how to tie a window scarf knot out of one continuous piece of fabric! You can learn how to make swags and jabots so that you won’t waste long hours dealing with how to make a swag hang perfectly. The process is rarely successful anyway. This process makes valances and swags hang perfectly – right from the start!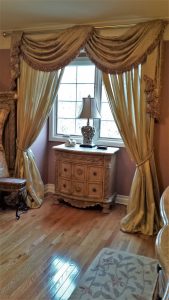
Trust me – you will NEVER be able to achieve the same look without sewing, no matter how hard you try. It may be the reason why you are reading this right now – you currently have DIY swag curtains hanging over one of your windows that you’re unhappy with. Don’t worry, I’m here to help you! Please don’t get intimidated by the process. This treatment is cut in many pieces, then sewn together one by one. So, please don’t waste time trying to get one continuous piece of fabric to look like my scalloped valances, because it is not possible! We must get a little more involved than that.
How to make a swag valance like a pro:
No matter what type or size window you have, my valance styles and valance swags are easy to fit your current situation. Learn how to conceptualize and measure for your design layout along with me. Now that you are in control of the final appearance of the window treatment, your valance designs can be completely customized to your liking. I show you how to cut a pattern, apply trim, construct, sew and hang this tailored valance in one complete video. With me at your side, you are successful fabricating this beautiful work of art for your home too. Drapery valances are easier than you think if you break the process down into small pieces.
Once you know how to make a valance for your window, you can sew these in every width, simply by adding or subtracting swags. Most fabrics are suitable for this style because of the way the fabric is cut – the swag(s) will automatically drape into beautiful folds. I’ll show you the professional way to cut your fabric so that you create gorgeous folds too. Trust me, it’s not what you think! There’s no other way to learn how to drape a window scarf to look like my window treatment. Correct construction is the only key to how to make a swag valance look like a professional made it.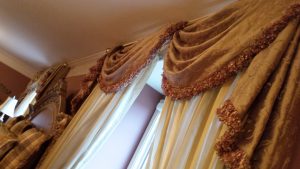
A little extra effort goes a LONG way…
Another PRO secret that I share with you is the use of lining and interlining. If your window scarf ideas don’t include these, then the entire window treatment falls flat – literally. This is how to make swag curtains look soft, full and sumptuous. You simply can’t get the same look out of one piece of fabric, even if it’s a thick piece. When I show you how to sew a swag valance together, layer-by-layer, you then understand why popular window scarfs can never have the same look and feel as this custom treatment. These swags need infrastructure to continue looking full for years to come.
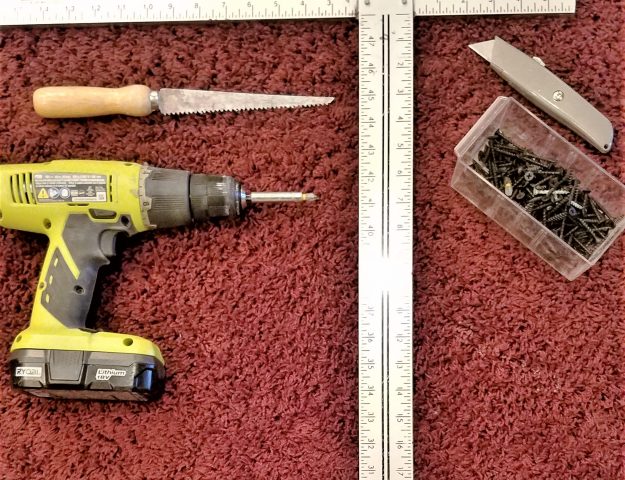
The only special tool you need in order to learn how to make a swag valance is a home sewing machine. I have an industrial sewing machine for heavy-duty upholstery projects but a simple home use machine that sews a straight line is all you need for this project. If you don’t have one, I love my Brother machine for it’s ease of use and intuitiveness. You can purchase the same machine that I use by clicking on the link above, if you don’t have one. Your machine can be old or new – it doesn’t matter. Most home sewing machines do the trick of sewing through a few layers of cloth and trim.
This is a versatile window treatment
 Why is this style so versatile? Because you have the ability to play with different fabrics (think formal, plain, striped, floral, etc.), you manipulate the level of formality or casualness of your room. So, whether you use this treatment in a living room, dining room, bedroom, kitchen or bath, your fabric choice makes it appropriate. Decorative trim also plays an important role in tying an overall color palette of your room together. The color palette can be further coordinated by contrasting lining. A hint of lining shows on the backside of the jabots so be creative with your fabric and color choices for a one-of-a-kind tailored valance!
The versatility of this valance swag is obvious because it also looks beautiful on both large and small windows. I show you how to DIY this window swag so that you have the ability to play with the depth of the swag(s) AND the length of the jabots. So, depending upon the height of your ceiling, you adjust the measurements accordingly. I give you the formula for getting the measurements correct for your individual space. You get all the information you need to make this like a PRO!
Don’t do this!
Forget the idea of draping one continuous piece of fabric over a pole! Are you looking for how to make a window scarf, ascot valance or wide pocket valance? If so, there’s no question that you’ll be happier with the results of this instructional video. If you’re looking for how to hang a window scarf on a metal rod, you’ve also come to the right place. My swag treatment stays put – automatically- on any rod material! Wood, metal, and resin easily work well with this completed treatment. This luxurious swag and jabot window topper stays put – no need for window scarf holder ideas!
