Basement Bar Ideas: Wet Bar Kitchenette
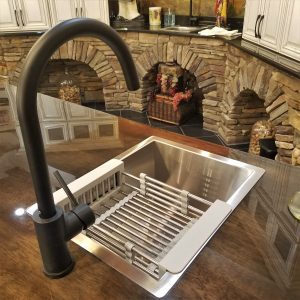 My Basement Bar Ideas: Wet Bar Kitchenette video is now available to view! This video teaches you many skills: run plumbing, install cabinetry, install appliances, apply stone veneer, nail trim wood, pour resin for a counter top and more. I share all my easy techniques with you for DIY success! My clever basement bar ideas will save you time and money too. Whether you have a small basement bar or large, I give you basement bar designs for all.
I’m highlighting 2 great companies…
I’m using light fixtures from my sponsor, Lamps Plus (you can view more lighting ideas in parts 1 and 2 of this video series). Their unbelievable selection will keep your basement kitchenette cost low while giving you the perfect style for your space. Energy efficient light fixtures like an LED strip light will light the underside of my birch and resin counter top. I’m also using a DRAMATIC crystal chandelier that makes my basement dining space gorgeous! You can see how it’s all done but you need to view all the way to the end because I save the best for last.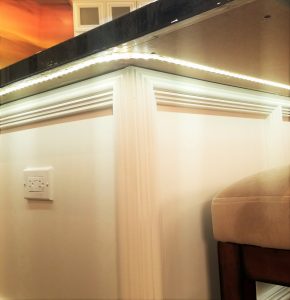
The ready-to-assemble basement bar cabinets are from Crown Granite in Farmington Hills Michigan. I save thousands by building RTA cabinets myself and you can too! Let me show you how simple it is to build your own cabinets that are solid wood (no particle board here) in about an hour each. Their quality will make your basement kitchenette last a lifetime! If you’re looking for a DIY budget bar build, this is the way to do it. Please check them out if you’re in the Metro Detroit area because most cabinets are in stock and ready for pick-up.
Let’s demolish the old bar!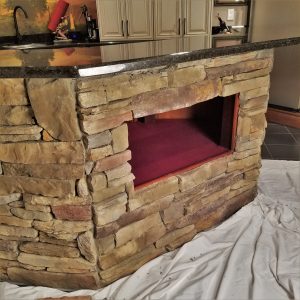
Looks can be deceiving. My existing bar looks beautiful. It has stone, granite and cherry wood doors but because it doesn’t have a wet bar or appliances, it doesn’t function the way I need it to. Sure, storage is great – I’ll build new storage areas so that I have plenty of space for everything I need to tend bar. Entertaining will be a breeze with a new second kitchen in basement. I’m installing a sink, dishwasher and oven to make this space a pleasure to use. But first, I’ll GENTLY dis-assemble the old bar so that I can re-use parts of it elsewhere in my home.
Because the new basement kitchen with island peninsula is being moved to a new location, I also have to demolish some of the floor tile. How to address flooring is the most complicated part of re-positioning a built in wet bar in your basement. First, I need to chip out a few of the old tiles and then replace them with fresh, whole tiles. Fortunately, I have JUST enough tile to fill in all the gaps! It really does make sense to save extra materials from your renovation projects but I have a few ideas in this video to help you in case you’re short on flooring.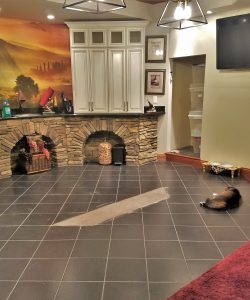
My basement kitchenette bar ideas:
Everything in this space is a DIY project. I don’t involve a single contractor in the entire process! Who’s the plumber? Me. Who’s the electrician? Me. Who’s the installer? Me. You get it – you can do it all too! My home bar ideas will guide you through the most “difficult” tasks and break them down into easy to accomplish pieces. I’ll guide you through cutting into water lines and attaching flexible tubing so that you can run water to your new wet bar (from near or far). A new faucet and sink installation is next. Most water and drain connections are hand tightened so there are no special tools required either.
My wet bar kitchenette idea also includes a custom counter top. This basement epoxy pour (alone) saves THOUSANDS on the project budget! You can get the resin kit on my SHOP page, in case you want the same look that I have. There are only two aspects to the resin that you need to be aware of. First; the temperature in the space needs to be 72 degrees or above and second; the mixtures need to be measured PRECISELY. No worries though, I show you exactly what you need for professional results. This is a very durable surface for any wet bar kitchenette ideas.
Easy stone work too!
I know people struggle with what to do with the front area of bars and peninsulas. Mostly, they’re left as blank surfaces with just a piece of paneling installed all the way across the front. This is too much real estate to waste that way. I’m getting creative and repeat design features built in to other areas of the bar so that the entire space relates to one another. It’s not difficult to apply stone or decorative trim to a large surface. You just need a few inexpensive tools to make it all go smoothly. I show you everything I use for a professional looking result.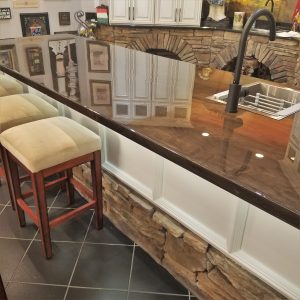
Can you do this?
Absolutely. I give you the inspiration and show you (step-by-step) how easy it is to have a grand basement bar that’s modern, rustic, with stone, on a budget and with a sink. It’s all up to you how you finish the wet bar kitchenette. Start with a sketch (like me) and take it from there. You can do as little or as much as you want. You’re the designer of your basement kitchenette bar ideas, so you do it your way. That’s really the best part of DIY-ing any project.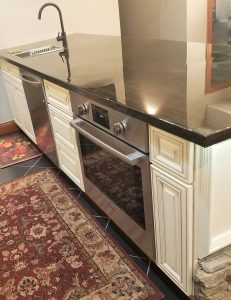
So, forget “12 Basement Bars We Love” and do 1 basement bar build that YOU love! Your basement kitchenette bar ideas are the best ones anyway. Only you know what works for the way you entertain. Please borrow ideas from me and I always love to see what everyone else does with them. There are so many wonderful ideas that make me love the creativity of DIY-ers. I can’t wait to see what you do with all the information in this Basement Bar Ideas: Wet Bar Kitchenette video!
